Canon printers are widely used for their best-in-class design, printing abilities, and reliability. The new-age models of Canon printers come with multiple functions and are usually called all-in-one printers. It means the printer can do more than print, scan, copy, and fax. So, this blog will guide you on how to scan on a Canon printer. It is most looked at as only now are users learning to use the scanning feature. Let us see the methods involved in scanning.
Method 1: Using Canon Scan Profile
After installing the Canon printer driver on your computer, Windows will automatically enable the print profile by default. You can easily switch to a scan profile and scan your files.
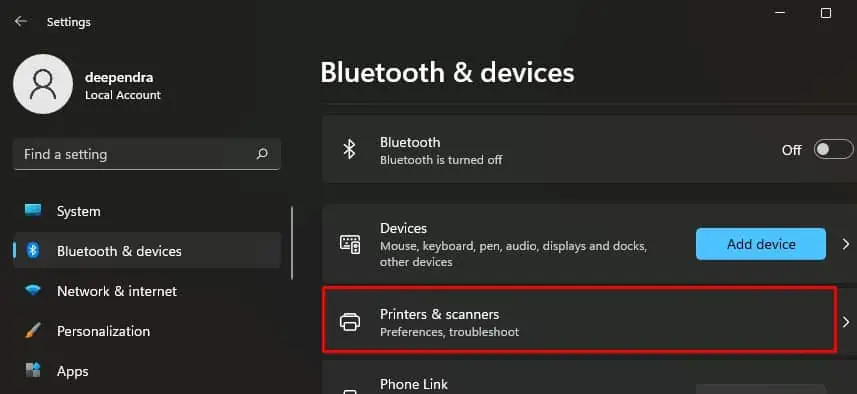
- The first step is to open the Settings on your Windows system.
- Next, navigate and open the Bluetooth & Devices menu.
- Here, look for Printers & Scanners and select them.
https://www.technewstoday.com/wp-content/uploads/2023/04/printers-and-scanners.webp
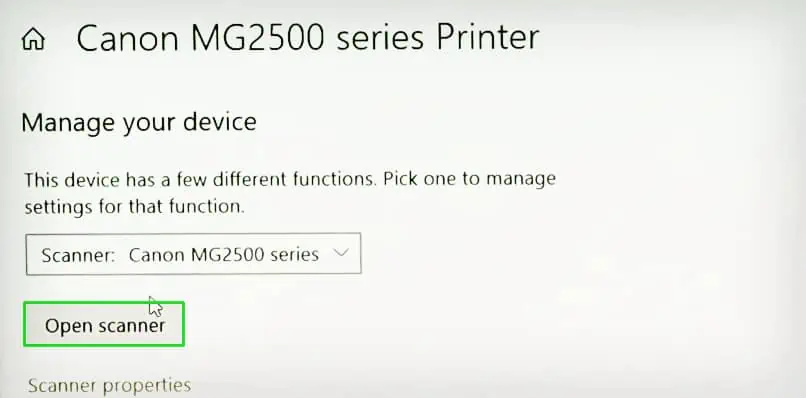
- Now, find your printer connected to the system and click Manage.
- In the next window, select Scanner from the drop-down menu.
- Then, you need to select the Open Scanner option.
https://www.technewstoday.com/wp-content/uploads/2023/04/open-scanner-button-in-settings-1.webp
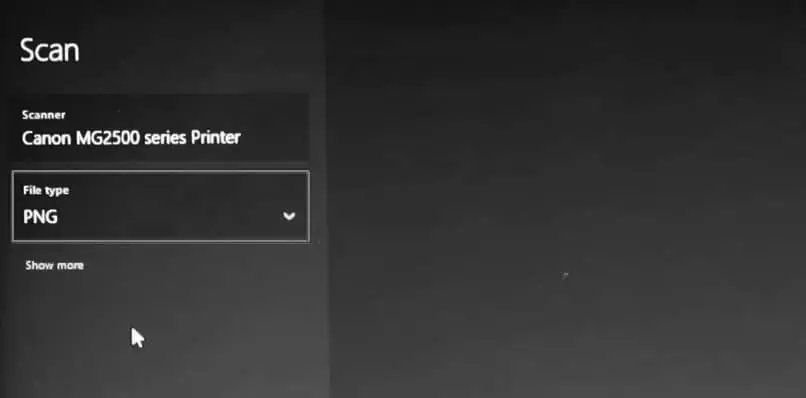
- Place the file you want to scan on the scanner glass. The document should be facing the scan side downwards.
- From the scan window on your system, you need to set the file type and select Scan.
https://www.technewstoday.com/wp-content/uploads/2023/04/file-type-while-scanning-from-settings.webp
- After the scanning, you can select the View button at the top right of the screen.
- Now, you can save the scanned file to your desired location.
Method 2: With Windows Scan Feature
Windows OS comes with built-in Fax and Scan features. So, you can use this feature to scan a document on your Canon printer.
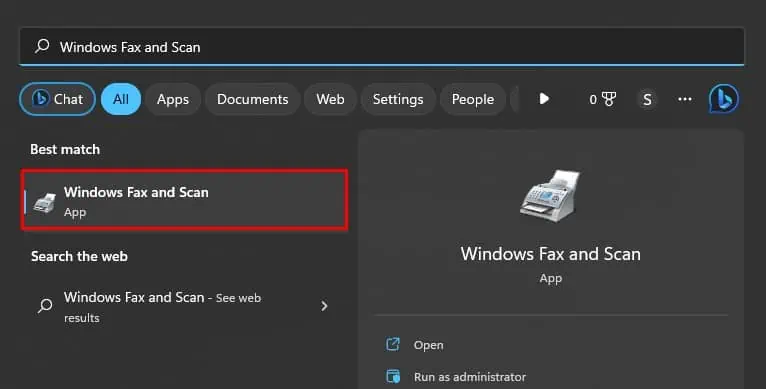
- The first step is to place the document on the scanner glass, which should be downwards.
- Next, type Windows Fax and Scan on the Startup search bar and open it.
https://www.technewstoday.com/wp-content/uploads/2023/04/open-windows-fax-and-scan.webp
- Once the Windows Fax and Scan screen opens, you must select the file from the Menu bar.
- After that, select New and then select Scan.
https://www.technewstoday.com/wp-content/uploads/2023/04/new-scan-on-windows-fax-and-scan.webp
- Now, select the Change button from the new scan window and then select your Canon printer.
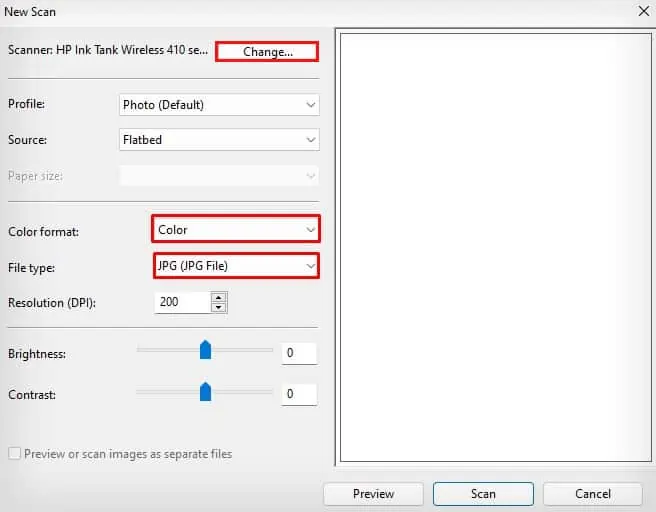
- Further, you can make necessary changes to your scanning preferences, such as Color format or File type.
- Then, you can select Scan, and you must wait until the printer completes scanning and documenting.
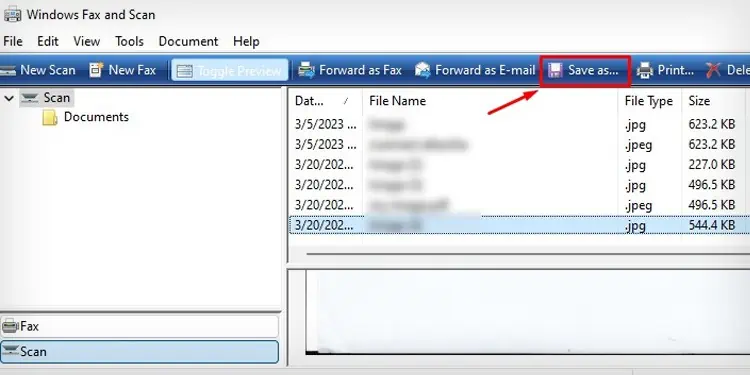
- Once the scanning is done, the document will appear on the screen.
- Finally, you can select Save to your desired location.
https://www.technewstoday.com/wp-content/uploads/2023/04/save-as-button-on-windows-fax-and-scan.webp
Method 3: Via IJ Scan Software
IJ Scan is a utility app from Canon. It is integrated with the driver package when you install the official printer drivers from Canon. It is easy to scan through this utility.
- Launching the IJ Scan Utility from the Windows start menu is the first step.
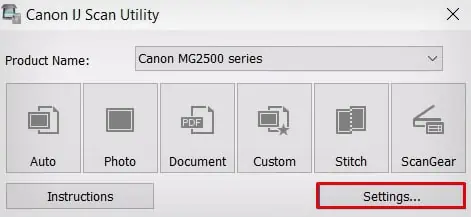
- Now, you will see a small scan center window on your screen.
- After that, look for the Settings option and click on it.
https://www.technewstoday.com/wp-content/uploads/2023/04/settings-in-ij-scan-utility.webp
- Next, it will ask you to select Document Scan on the left pane.
- Afterward, you can adjust your Scan Options and then Save Settings per your requirements. And click OK.
- Further, you need to select Document from the main scan center window.
- Now, the printer will start to scan your document.
- So, you should wait until the Scan Completed message appears on the Windows screen.
- Finally, you need to Exit and open the folder you specified earlier to see your scanned document.
Method 4: Using the Touch Panel on Your Printer
Nowadays, all printers come with a touch panel. Using this touch panel, let us see how to scan on a Canon printer.
- The first step is to connect your Canon printer to the power supply.
- Also, connect the printer to your computer with a USB cable.
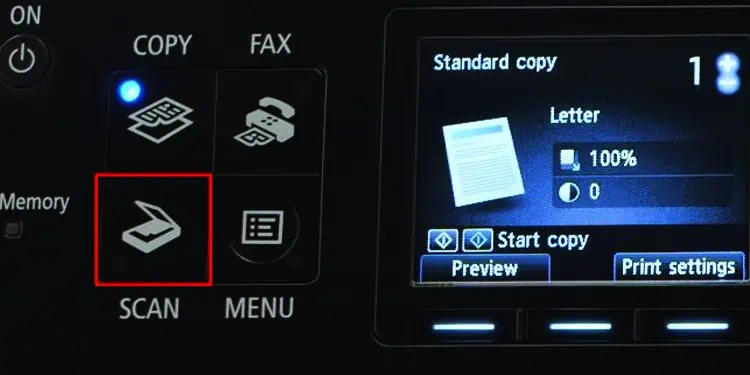
- Now, take the document you want to scan, lay it down on the scanner glass, and close the lid.
- On the touch panel, you must tap the Scan button.
https://www.technewstoday.com/wp-content/uploads/2023/04/scan-button-on-pixma-mx922.webp
- Afterward, you will see a standby screen.
- Further, you have to change the document type using the arrow buttons on the printer.
- However, for optimal scanning results, you can select Auto Scan.
- Then you have to select the Color or Black button. It will depend on which color you want the final scanned document.
https://www.technewstoday.com/wp-content/uploads/2023/04/color-and-black-button-in-pixma-mx922.webp
- Finally, once the scanning process is done, it will be saved automatically.
- To access it, go to the Documents folder on your PC, and you will find the scanned document.
Conclusion
Canon printers of the new age models are equipped with enough features to do more than just print. So, it means the Canon printers can now also scan and copy. But only a few users know that there is more than one through which they can scan a document from the Canon printer, addressing how to scan on a Canon printer in multiple ways. In this blog, we have covered four methods for selecting whichever suits you the best.
FAQs
How to scan more than one Document at a time on a Canon printer?
The few Canon printer models come with Auto Document Feeder (ADF). If you want to scan multiple documents, you can place all the documents in the ADF. After that, you have to set one-side or two-side scanning. Now, wait for the printer to scan the files one by one. It will take one file at a time and scan it.
What are the Scanner Button settings on a Canon printer?
The five buttons on the scanner are collectively referred to as scanner buttons. Using these buttons, you can create PDF files, print items, send images, copy, or auto-scan using these five buttons. All you have to do is place the file on the scanner glass and close it. Now, press the particular scanner button.
How to scan on a Canon printer using the app?
To scan the document using an app on your mobile, you have to place the document either on the scanner glass or in the ADF. Now, open the Canon PRINT Inkjet/SELPHY app on your mobile and select the Scan icon. Select the Scan option here, and the printer will scan the document. After scanning, select the exit or scan to scan different files. Now, it will be saved on your mobile, and you can view it.
Visit Site – ij.start.canon
ij.start.canon setup
ij start canon

Leave a comment